
Why Prep Work Decides How Long Your Paint Job Lasts
Understand how surface preparation, materials, and climate in Toronto influence durability, and what you can do to get the longest life from a fresh paint job.
How exactly does prep affect paint longevity in a real home in Toronto?
Prep sets the foundation for adhesion, moisture handling, and finish durability. If you seal, prime, and clean correctly, you’re less likely to see premature peeling, cracking, or fading. Proper prep accommodates Toronto’s seasonal swings—from damp springs to dry summers—so the film remains intact and aesthetically consistent for years.
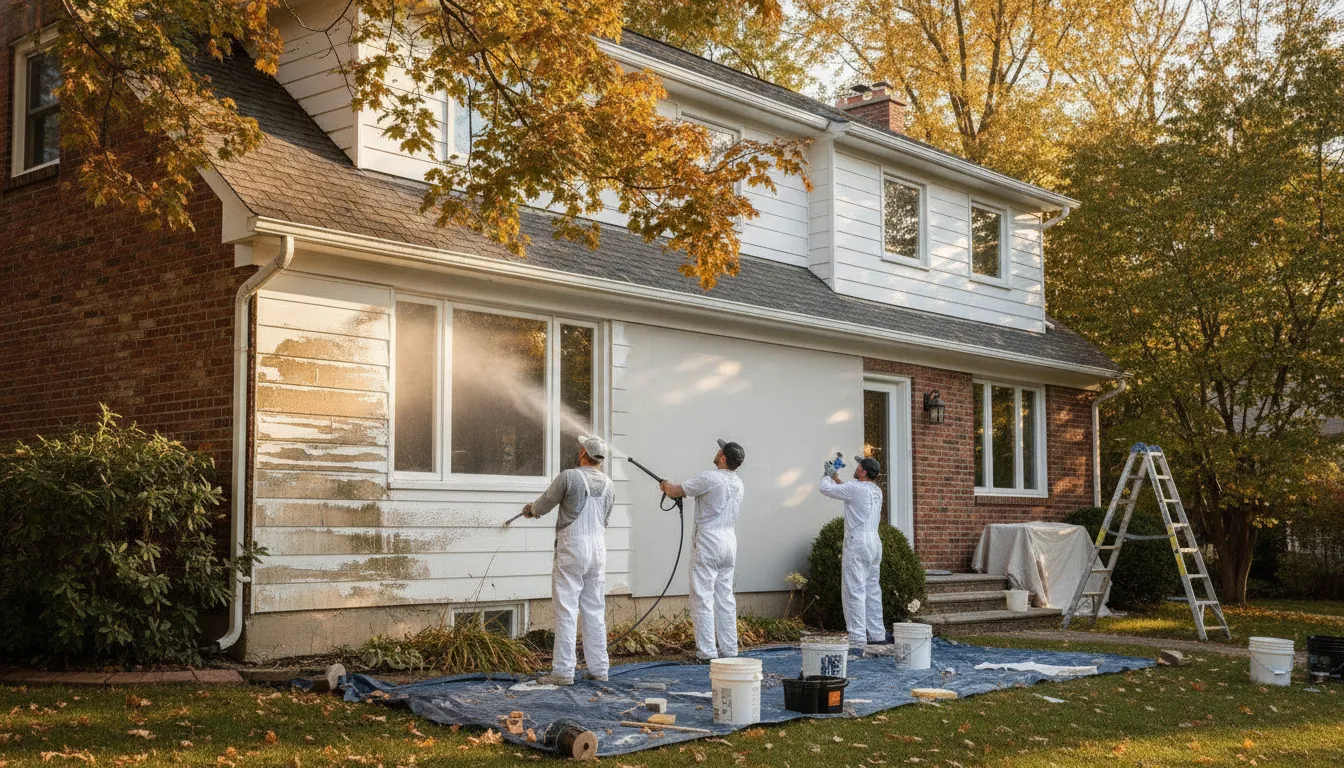
Surface cleanliness and contamination
Dust, oils, and chalky residue trap dirt and prevent bonding. A thorough wash, degreasing, and rinse ensure the primer can grip the substrate. Skipping this step invites early failure and uneven sheen.
Repairing and leveling the substrate
Small cracks or protrusions become magnified under paint. Filling, sanding, and smoothing create a uniform base, reducing paint capillary action that leads to peeling. In Ontario, local building tolerances can vary; match repair methods to the substrate (plaster, drywall, masonry).
Appropriate primer choice
A primer tailored to the substrate stops tannin bleed, improves adhesion, and blocks stains. In Toronto’s climate, shellac or bonding primers are common behind knots or porous masonry, while water-based primers suit most exterior surfaces with careful follow-up coats.
Moisture management
Moisture is the silent killer of paint life. Proper flashing, caulking, and sealing prevent water ingress around windows, doors, and joints. In our climate, timing coatings with dry periods and ensuring proper ventilation during interior jobs matters.
Step-by-Step: Why Prep Work Decides How Long Your Paint Job Lasts
This sequence captures how a typical project unfolds from a homeowner’s perspective to a contractor’s workflow, with practical steps you can verify at each stage.
- 1
Assess the project and surface
Identify substrate type (wood, masonry, drywall), existing coatings, and moisture conditions. Document obvious damage and suspect areas so you can plan the right primers and repair materials.
- 2
Clear, clean, and dry
Remove dirt, oil, and efflorescence. Ensure surfaces are dry before priming. In Toronto’s variable humidity, this often means choosing dry-weather windows and allowing extra drying time after rain.
- 3
Repairs and smoothing
Fill cracks, sand rough patches, and address adhesion issues. Use compatible fillers for interior vs. exterior work. The goal is a flat, even plane before coating begins.
- 4
Prime with purpose
Select primers based on substrate and stain risks. For varnished wood or knot-prone areas, use stain-blocking primers; for masonry, use masonry primers. Apply evenly with proper coverage and let cure as recommended by product specs.
- 5
Caulking and sealing
Seal gaps around trim, windows, and door frames to prevent moisture intrusion. Use exterior-grade sealants for outside work and ensure paint can shed water rather than trap it.
- 6
Topcoat with appropriate system
Choose a finish and number of coats suited to the environment and substrate. Exterior masonry might need elastomeric coatings in some cases, while interior walls typically benefit from compatible acrylic systems. Finish durability depends on adherence to the prep foundation.
Mistakes to Avoid
Even small missteps in prep can shorten a paint job’s life. Here are common pitfalls and how to sidestep them.
Rushing the cleaning phase
Inadequate cleaning leaves gloss and oils that hinder adhesion. Take time to degrease; don’t rush to priming. A clean surface saves touch-ups later.
Skipping repairs or over-smoothing
Neglecting cracks or using the wrong filler creates stress points. Proper filler and feathered edges keep the finish uniform and crack-resistant.
Using the wrong primer or paint system
A substrate-mismatched primer or a low-durability exterior paint on a harsh face can fail early. Match system components across primers, seals, and topcoats.
Poor moisture management
Failing to address moisture around windows, doors, or flashing invites peeling and staining. Ensure flashing and caulking are integrated with the coating system.
What Affects Your Outcome
A few practical factors shape how long prep will keep your paint looking good in Toronto and the GTA.
Seasonal climate and timing
Toronto’s wet springs and humid summers influence drying, curing, and substrate stability. Scheduling in dry spells and allowing for proper cure times helps coatings perform as intended.
Substrate condition and age
Older surfaces or mixed substrates (wood, plaster, masonry) need tailored prep and primers. New builds behave differently than renovated spaces, impacting adhesion and longevity.
Quality of materials
Primer, topcoat, and sealants must be compatible and suited to the substrate and climate. Inconsistent products can fail at the interface or seal, especially in Ontario’s freeze-thaw cycles.
Moisture and ventilation
Interior environments require controlled humidity; exterior surfaces benefit from proper drainage and sun exposure considerations. Ventilation aids curing and reduces moisture-related defects.
Contractor methods and workmanship
Consistency in surface prep, application thickness, and follow-up curing determines durability. A methodical, well-documented process reduces surprises later.
Code, permits, and policies
Local rules may require certain surface treatments or inspections, especially on exterior renovations or multi-unit buildings. Always verify with your insurer and the local building department for scope and coverage.
Free Prep-Check Assessment for Your Toronto Home
We offer a complimentary surface-prep assessment to help you plan for a longer-lasting paint job in our local climate.
Get a Free Quote